
How to Connect to Starlink with Your Phone: Essential Tips

Satellite internet is reshaping connectivity across Kenya, providing fast and reliable access even in remote areas where traditional broadband options are limited. Starlink, developed by SpaceX, delivers high-speed internet through its satellite dish and Wi-Fi router setup, allowing users to enjoy seamless online experiences. Connecting your phone to Starlink is simple, giving you the ability to manage your network, monitor performance, and stay connected wherever you are.
Getting your phone online via Starlink involves a few straightforward steps. Once the dish is properly installed and the Starlink router is powered on, you can search for the Starlink Wi-Fi network on your phone, enter the secure password, and gain instant access. The connection allows you to browse the internet, stream content, and even use apps that require low-latency performance. Additionally, the Starlink app on your phone provides tools for monitoring network status, running speed tests, and managing connected devices.
Optimizing and troubleshooting your Starlink connection on a mobile device ensures a smooth internet experience. Common tips include keeping your router firmware updated, maintaining a clear line of sight for the dish, and adjusting network settings for better performance. By following these guidelines, users in Kenya can fully harness the power of Starlink, enjoying stable, high-speed internet on their phones for work, study, or entertainment.
1. Understanding How Starlink Connects to Devices

Starlink delivers high-speed satellite internet that can be accessed by multiple devices in homes, offices, and remote locations. Knowing how the connection works helps users optimize performance and manage their network effectively.
1.1 How Starlink Provides Internet via Satellite Dish and Router
Starlink internet begins with the satellite dish, often called the user terminal.
Key Points:
-
Satellite Communication: The dish communicates directly with Starlink’s low-earth-orbit satellites to receive and send data.
-
Dish to Router Link: The dish connects to a Wi-Fi router via a cable, allowing internet distribution throughout the home or office.
-
Ground Power Supply: The router and dish require a stable power connection for consistent service.
The combination of the dish and router transforms satellite signals into usable internet for devices.
1.2 Creating a Local Wi-Fi Network
Once connected to the router, Starlink creates a local Wi-Fi network.
-
SSID and Password: Users can customize the Wi-Fi network name and password for security.
-
Connectivity: Any Wi-Fi-enabled device, including smartphones, tablets, and laptops, can join the network.
-
Network Range: Coverage depends on router placement, typically sufficient for a standard home or small office.
The Wi-Fi network acts as the bridge between the satellite internet and your devices, enabling wireless connectivity throughout the space.
1.3 Supporting Multiple Devices Simultaneously
Starlink is designed to handle multiple connections without significant performance drops.
Key Points:
-
Households: Several devices can stream, browse, and work online simultaneously.
-
Offices: Supports multiple laptops, phones, and IoT devices for businesses or remote work.
-
Load Distribution: The router manages bandwidth among connected devices to maintain stable speeds.
Starlink’s system ensures consistent internet for multiple users, making it suitable for both personal and professional environments.
1.4 Benefits of Connecting Your Phone
Using a phone on the Starlink network offers several advantages.
-
Mobility: Users can access internet anywhere within Wi-Fi coverage without a cable.
-
Real-Time Monitoring: The Starlink app allows users to track network performance directly from their phone.
-
Network Management: Devices can be prioritized, connected, or removed easily via mobile control.
Connecting your phone enhances convenience, control, and monitoring, making it an essential part of managing a Starlink network.
Starlink connects to devices through a satellite dish and Wi-Fi router, creating a local network that supports multiple users simultaneously. Phones and other mobile devices can access the internet, monitor performance, and manage network settings in real-time, providing flexibility, mobility, and control for both homes and offices in Kenya.
2. Preparing Your Phone for Connection
Before connecting your phone to Starlink internet, certain preparations ensure a smooth and stable connection. These steps help users avoid common issues and take full advantage of Starlink’s performance.
2.1 Ensuring Your Phone’s Wi-Fi is Turned On
A fundamental step before connecting is activating your phone’s Wi-Fi feature.
-
Settings Access: Navigate to your phone’s settings to turn on Wi-Fi.
-
Network Scan: Once on, the phone will automatically scan for nearby networks, including the Starlink Wi-Fi.
-
Signal Detection: Ensure you are within range of the Starlink router to see the network listed.
Turning on Wi-Fi is the first step to accessing Starlink, enabling your phone to detect and join the network.
2.2 Confirming Compatibility with Wi-Fi 2.4 GHz or 5 GHz Networks
Starlink routers support both 2.4 GHz and 5 GHz Wi-Fi bands, so your phone must be compatible.
Key Points:
-
2.4 GHz Band: Offers wider coverage and better penetration through walls; suitable for general browsing.
-
5 GHz Band: Provides faster speeds but shorter range; ideal for streaming or gaming.
-
Device Check: Most modern smartphones support both bands, but verifying ensures optimal connectivity.
Checking compatibility ensures your phone can connect reliably to either Wi-Fi band, maximizing performance.
2.3 Making Sure Your Starlink System is Powered On and Fully Installed
Your phone cannot connect unless the Starlink system is active and ready.
-
Power Supply: Confirm both the dish and router are plugged in and receiving electricity.
-
System Initialization: Wait for the Starlink system to complete its boot and alignment process.
-
Indicator Lights: Check the router and dish indicators to confirm they are functioning normally.
A fully powered and initialized Starlink system is critical for a seamless connection to your phone.
2.4 Optional: Installing the Starlink App for Monitoring and Setup
While not required, the Starlink app enhances control and monitoring of your network.
-
Device Management: Add or remove connected devices directly from your phone.
-
Signal Monitoring: Check Wi-Fi strength and latency in real-time.
-
Troubleshooting: Receive alerts and guidance for any connectivity issues.
Installing the app provides an added layer of convenience, allowing users to monitor, manage, and optimize their Starlink connection directly from their phone.
Preparing your phone for Starlink involves turning on Wi-Fi, confirming band compatibility, ensuring the system is powered and installed, and optionally using the Starlink app. These steps guarantee a smooth connection experience, helping users in Kenya access reliable, high-speed satellite internet without interruptions.
3. Finding Your Starlink Network
Before connecting your phone to Starlink internet, you first need to locate the correct Wi-Fi network broadcast by your Starlink router. This ensures a secure connection and avoids interference from nearby networks.
3.1 Identifying the Default Starlink SSID
Every Starlink router comes with a default network name, called the SSID (Service Set Identifier).
-
Router Label: The SSID is usually printed on a sticker on the router or in the setup guide.
-
Default Format: Typically labeled “Starlink-XXXX,” where “XXXX” represents unique characters for your device.
-
Initial Password: The network has a preset password for the first-time connection.
Knowing your router’s SSID is essential for connecting to your own Starlink system securely.
3.2 Accessing Wi-Fi Settings on Your Phone
After identifying the SSID, open your phone’s Wi-Fi menu to search for networks.
-
Navigating Settings: Usually found under “Settings” → “Wi-Fi” or “Connections.”
-
Enabling Wi-Fi: Make sure Wi-Fi is switched on to detect available networks.
-
Scanning for Networks: Your phone will display all networks within range.
Accessing Wi-Fi settings prepares your phone to find and connect to the Starlink network.
3.3 Selecting the Correct Starlink Network
Once the list of networks appears, locate your Starlink SSID.
-
Matching the SSID: Ensure it matches the name printed on your Starlink router.
-
Signal Strength: Prefer the network showing the strongest signal for best performance.
-
Avoiding Nearby Devices: If multiple Starlink devices are nearby, confirm you select your own.
Choosing the correct SSID ensures your connection is directed to your own Starlink device.
3.4 Connecting and Entering the Password
After selecting your SSID, you can connect to the network.
-
Entering Credentials: Input the default or custom Wi-Fi password.
-
Connection Status: Wait for the phone to indicate “Connected” or show a checkmark.
-
Testing Internet: Open a browser or app to verify that Starlink internet is active.
Selecting the correct network and entering the password completes the first step toward accessing Starlink internet on your phone.
Finding your Starlink network involves identifying the SSID, opening Wi-Fi settings, selecting the correct network, and entering the password. These steps ensure a secure, reliable connection, giving you access to high-speed Starlink internet anywhere in Kenya.
4. Connecting Your Phone to Starlink

Once you have located your Starlink network, the next step is to connect your phone to access satellite internet. This ensures your device can send and receive data through the Starlink router.
4.1 Selecting the Starlink Network on Your Phone
To begin the connection process, tap the Starlink SSID you identified in the previous step.
-
Navigating Wi-Fi Settings: Open your phone’s Wi-Fi menu and find the list of available networks.
-
Choosing the Correct Network: Make sure the SSID matches the one printed on your Starlink router to avoid connecting to another network nearby.
-
Confirm Selection: Tap the network name to initiate the connection process.
Selecting the correct Starlink network is the first step toward establishing a reliable internet connection.
4.2 Entering the Wi-Fi Password
After selecting the network, you must input the password associated with your Starlink SSID.
-
Default or Custom Password: Use the password provided with your Starlink kit, or enter your custom password if you have already changed it.
-
Security Measures: Ensure the password is entered correctly, including uppercase and lowercase letters, numbers, and any special characters.
-
Preventing Unauthorized Access: This step ensures that only authorized devices can access your network.
Entering the correct password securely connects your phone to the Starlink router.
4.3 Confirming a Successful Connection
After entering the password, wait for your phone to confirm it has successfully connected.
-
Connection Indicators: Most devices display a checkmark, “Connected,” or Wi-Fi signal icon.
-
Troubleshooting: If the connection fails, double-check the SSID and password or restart the Wi-Fi on your phone.
-
Network Priority: Your phone will now prioritize this network for internet access.
Confirming the connection ensures that your phone is now part of the Starlink network and ready to access the internet.
4.4 Verifying Internet Access
Once connected, test your internet to make sure the Starlink service is active.
-
Opening a Browser: Try loading a website to see if pages load quickly.
-
Running a Speed Test: Check latency, download, and upload speeds to confirm expected performance.
-
Monitoring Performance: Use the Starlink app for real-time connection metrics and signal strength.
Verifying internet access guarantees that your phone is properly connected and receiving high-speed Starlink connectivity.
Connecting your phone to Starlink involves selecting the correct network, entering the Wi-Fi password, confirming the connection, and testing internet access. Following these steps ensures your phone can fully utilize Starlink’s satellite internet for browsing, streaming, and remote work anywhere in Kenya.
5. Using the Starlink App with Your Phone

The Starlink app allows you to manage and monitor your internet connection directly from your phone. It provides real-time insights, network configuration options, and troubleshooting tools for both residential and business users in Kenya.
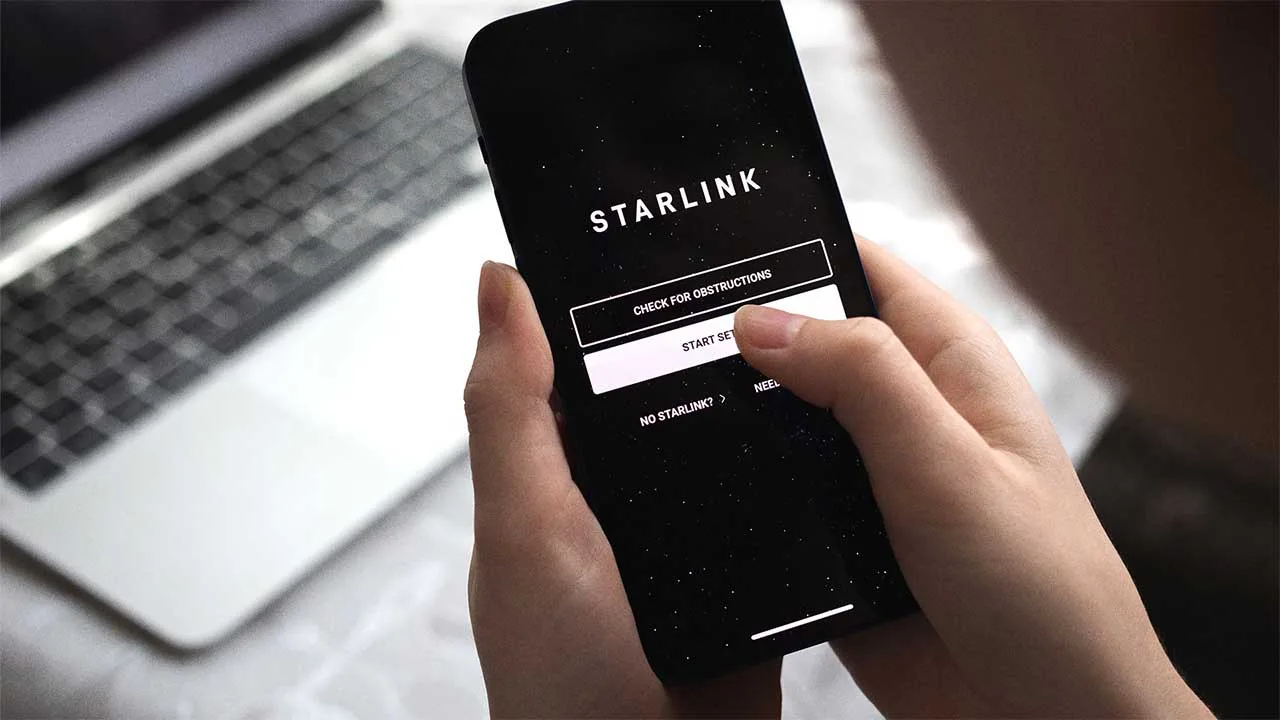
5.1 Downloading and Installing the Starlink App
To get started, download the official Starlink app from your device’s app store.
-
For Android Users: Open the Google Play Store, search for “Starlink,” and tap “Install.”
-
For iOS Users: Open the Apple App Store, locate “Starlink,” and download the app.
-
Device Compatibility: Ensure your phone meets the minimum operating system requirements for smooth performance.
Installing the app provides a centralized platform for managing your Starlink network on your phone.
5.2 Logging In with Your Starlink Account
Once installed, log in using the credentials you created when setting up your Starlink account.
-
Username and Password: Use the email and password linked to your Starlink account.
-
Secure Access: Ensure you are logging in through the official app to protect your account.
-
Single Sign-On: The same account works across multiple devices, including tablets and other phones.
Logging in connects the app to your Starlink hardware, allowing you full control over your network.
5.3 Monitoring Speed, Latency, and Network Performance
The app provides real-time analytics of your internet connection.
-
Speed Tests: Measure download and upload speeds directly from the app.
-
Latency Checks: Monitor response times for smooth browsing, streaming, and video calls.
-
Network Status: Track uptime, signal strength, and overall stability.
Regular monitoring helps you ensure optimal Starlink performance and quickly identify potential connectivity issues.
5.4 Adjusting Network Settings from Your Phone
The Starlink app allows you to manage key settings without needing a computer.
-
Wi-Fi Name (SSID) and Password: Customize network names and passwords for security and ease of use.
-
Device Prioritization: Assign priority to devices that require more bandwidth, such as work laptops or streaming equipment.
-
Advanced Options: Depending on your plan, adjust settings for multiple networks or guest access.
The app simplifies network management, letting users optimize performance and maintain security directly from their phone.
Using the Starlink app on your phone enables you to monitor connection quality, adjust network settings, and manage devices seamlessly. This functionality provides flexibility and control for both residential and business users in Kenya, ensuring a reliable and optimized Starlink internet experience.