

Starlink Cable Routing Kit Kenya – Ultra-Detailed Wall Drilling, Cable Protection & Professional Installation Guide 2026 The Starlink Cable Routing Kit is an installation accessory designed to help users safely route Starlink cables through walls while protecting the...
The Starlink Cable Routing Kit is an installation accessory designed to help users safely route Starlink cables through walls while protecting the cable, sealing the entry point, and keeping the installation clean and professional. It is especially useful when the Starlink dish is mounted outside but the router, power supply, or networking equipment must remain indoors.
The kit is designed for users who need to pass the Starlink cable through surfaces such as:
Wooden walls
Drywall
Light exterior walls
Interior partitions
Wall panels
Certain non-masonry surfaces
Selected outdoor-to-indoor entry points
Starlink cable routing kits commonly include a 3/4 inch / 1.9 cm spade bit, drill bit, cable routing tool, silicone sealant, grommets, and wall clips. Starlink’s customer guide notes that the standard cable routing kit is designed for most walls but is not recommended for masonry, concrete, or hard coat stucco, while a separate masonry routing kit is intended for those harder surfaces.
| Cable Routing Kit Type | Estimated Kenya Price | Best Use |
|---|---|---|
| Basic Cable Routing Kit | KSh 5,000 – 10,000 | Simple home routing |
| Standard Starlink Cable Routing Kit | KSh 12,000 – 18,000 | Most wall installations |
| Masonry Cable Routing Kit | KSh 15,000 – 25,000 | Concrete and masonry walls |
| Cable Routing Kit + Installation Labour | KSh 20,000 – 45,000 | Professional home setup |
| Full Cable Routing + Mounting Package | KSh 40,000 – 120,000+ | Homes, offices, lodges, farms |
Kenyan listings show the Starlink Cable Routing Kit at around KSh 18,000, including shipping and handling, with the kit containing the spade bit, drill bit, cable routing tool, silicone sealant, grommets, and wall clips.
| Component | Basic Home Setup | Office Setup | Lodge / Farm Setup |
|---|---|---|---|
| Starlink Kit | KSh 45,000 – 65,000 | KSh 45,000 – 65,000 | KSh 45,000 – 65,000 |
| Cable Routing Kit | KSh 12,000 – 18,000 | KSh 15,000 – 25,000 | KSh 18,000 – 30,000 |
| Wall Mount / Pipe Adapter | Optional | KSh 8,000 – 25,000 | KSh 15,000 – 45,000 |
| Installation Labour | KSh 8,000 – 20,000 | KSh 15,000 – 40,000 | KSh 25,000 – 80,000 |
| Cable Protection / Conduit | KSh 2,000 – 8,000 | KSh 5,000 – 20,000 | KSh 10,000 – 40,000 |
| Estimated Total | KSh 67,000 – 111,000 | KSh 88,000 – 175,000 | KSh 113,000 – 260,000+ |
| Problem Without Cable Routing Kit | Result | Cable Routing Kit Benefit |
|---|---|---|
| Open wall hole | Water and dust entry | Sealed cable entry |
| Poor cable routing | Cable strain | Cleaner cable path |
| Drilling without guide | Cable damage risk | Safer routing process |
| No wall clips | Messy installation | Organized cable layout |
| Weak sealing | Moisture ingress | Silicone and grommet protection |
| Buyer Type | Suitability |
|---|---|
| Home users | Excellent |
| Offices | Excellent |
| Lodges and hotels | Excellent |
| Farms and rural homes | Excellent |
| Schools and clinics | Excellent |
| Construction sites | Excellent |
| Temporary campers | Moderate |
| Vehicle users | Not usually needed |
The Starlink Cable Routing Kit is ideal for users who want a clean, sealed, and professional outdoor-to-indoor Starlink cable installation.
| Specification | Details |
|---|---|
| Product Type | Cable wall routing kit |
| Main Use | Routing Starlink cable through walls |
| Standard Wall Support | Most walls |
| Masonry Support | Requires masonry routing version |
| Standard Spade Bit | 3/4 inch / 1.9 cm |
| Sealant Included | Silicone sealant |
| Cable Protection | Grommets and wall clips |
| Skill Level | Best for experienced installers |
The standard kit includes a 3/4 inch / 1.9 cm spade bit, drill bit, cable routing tool, silicone sealant, grommets, and wall clips.
| Included Component | Purpose |
|---|---|
| 3/4 inch spade bit | Drills larger wall opening |
| Drill bit | Pilot hole drilling |
| Cable routing tool | Helps guide cable through wall |
| Silicone sealant | Seals wall entry point |
| Grommets | Protect cable and wall hole |
| Wall clips | Secure cable along wall |
A Kenyan Starlink Cable Routing Kit listing confirms these included components and states that the required tools are a drill and stud/electrical finder.
| Feature | Standard Cable Routing Kit | Masonry Cable Routing Kit |
|---|---|---|
| Best for | Most walls | Concrete, masonry, hard coat stucco |
| Masonry support | No | Yes |
| Drill requirement | Standard drill | Hammer drill recommended |
| Installer skill | Moderate | Higher |
| Wall type | Wood, drywall, light surfaces | Concrete and hard walls |
Starlink’s customer guide states the standard kit is not recommended for masonry, concrete, or hard coat stucco, while the masonry routing kit is designed for masonry, concrete, and hard coat stucco excluding EIFS.
| Tool | Purpose |
|---|---|
| Drill | Drilling wall holes |
| Stud / electrical finder | Avoiding pipes and wiring |
| Hammer drill | Masonry version |
| Goggles | Eye protection |
| Gloves | Hand protection |
| Mask | Dust protection |
For masonry/concrete installations, Kenyan listings recommend tools such as a hammer drill, Phillips head drill bit, stud/electrical finder, goggles, gloves, and mask.
| Specification | Details |
|---|---|
| Package Type | Compact accessory kit |
| Package Dimensions | Approx. 3.75" × 5.25" × 1.75" |
| Main Material | Drill bits, grommets, silicone, clips |
| Installation Type | Wall penetration and cable sealing |
Some Starlink Cable Routing Kit listings give package dimensions of approximately 3.75" × 5.25" × 1.75" / 34.9 × 13.3 × 4.4 cm.
The Cable Routing Kit is a small but important installation accessory that helps protect the Starlink cable and seal the wall entry point properly.
| Wall Type | Standard Kit Suitability | Notes |
|---|---|---|
| Drywall | Excellent | Common indoor use |
| Wooden wall | Excellent | Easy drilling |
| Light exterior wall | Good | Seal properly |
| Fiberboard | Good | Use care |
| Masonry wall | No | Use masonry kit |
| Concrete wall | No | Use masonry kit |
| Hard coat stucco | No | Use masonry kit |
| Building Type | Suitability |
|---|---|
| Homes | Excellent |
| Offices | Excellent |
| Lodges | Excellent |
| Farmhouses | Excellent |
| Apartments | Good with approval |
| Schools | Excellent |
| Clinics | Excellent |
| Warehouses | Good |
| Entry Location | Recommendation |
|---|---|
| High exterior wall | Good if protected |
| Near router location | Excellent |
| Under roof shade | Excellent |
| Exposed rain-facing wall | Use extra sealing |
| Near power outlet | Avoid drilling too close |
| Near plumbing lines | Avoid without checking |
Starlink’s cable routing PDF warns users not to drill through studs, pipes, or electrical wiring and recommends using a stud/electrical finder before drilling.
| Starlink System | Cable Routing Kit Use |
|---|---|
| Standard Gen 3 / Standard 4X | Yes |
| Standard Actuated Gen 2 | Yes |
| Starlink Mini | Yes, depending on cable route |
| High Performance | Yes, with correct cable planning |
| Enterprise Kit | Yes, with professional installation |
The Cable Routing Kit can be useful for different Starlink systems, but the correct wall type and drilling method must be selected before installation.
| Step | Action |
|---|---|
| 1 | Choose the best cable entry point |
| 2 | Check for studs, pipes, and electrical wiring |
| 3 | Unplug Starlink before installation |
| 4 | Drill pilot hole |
| 5 | Use spade bit to enlarge the hole |
| 6 | Feed cable using cable routing tool |
| 7 | Insert grommets |
| 8 | Apply silicone sealant |
| 9 | Secure cable using wall clips |
| 10 | Reconnect Starlink and test internet |
Starlink’s routing guide instructs users to unplug Starlink before installation, avoid studs, pipes, and electrical wiring, drill the hole, and use the cable routing tool to funnel the cable through the wall.
| Best Practice | Benefit |
|---|---|
| Use a stud/electrical finder | Avoids hidden wiring and pipes |
| Drill from the correct side | Cleaner wall finish |
| Seal both sides properly | Better water protection |
| Avoid tight cable bends | Longer cable life |
| Use wall clips | Cleaner installation |
| Test cable after installation | Confirms performance |
| Mistake | Result |
|---|---|
| Drilling without scanning wall | Electrical or pipe damage |
| Using wrong kit on concrete | Poor installation |
| No silicone sealant | Water ingress |
| No grommet | Cable abrasion |
| Tight cable pull | Cable damage |
| Routing near sharp edges | Long-term failure |
| Safety Check | Importance |
|---|---|
| Starlink unplugged | Critical |
| Wall scanned first | Critical |
| Correct drill bit used | High |
| Eye protection worn | High |
| Cable not crushed | Critical |
| Sealant applied correctly | High |
The routing kit should be installed carefully because poor drilling or weak sealing can damage the wall, the cable, or the Starlink system.
| Protection Item | Benefit |
|---|---|
| Grommet | Prevents cable abrasion |
| Silicone sealant | Blocks water and dust |
| Wall clips | Prevents loose cable movement |
| Routing tool | Reduces cable pulling damage |
| Proper drill hole | Cleaner cable entry |
| Risk | Protection Method |
|---|---|
| Rain entering wall | Silicone sealant |
| Dust entry | Grommet and sealant |
| Cable rubbing wall | Grommet |
| Outdoor cable movement | Wall clips |
| Insect entry | Proper sealing |
| Cable Routing Practice | Impact |
|---|---|
| Smooth cable bends | Longer lifespan |
| No sharp edges | Reduced cable damage |
| Protected wall entry | Better durability |
| Clips every short distance | Reduced movement |
| Proper sealant | Less moisture damage |
| Exposure Type | Recommendation |
|---|---|
| Direct rain | Seal carefully |
| Strong sun | Use cable clips/conduit |
| Dusty areas | Seal grommets well |
| High wind | Secure cable firmly |
| Coastal humidity | Inspect regularly |
The Cable Routing Kit improves installation durability by protecting the cable and sealing the wall entry point against moisture, dust, insects, and abrasion.
| Accessory | Best Use |
|---|---|
| Cable Routing Kit | Passing cable through walls |
| Cable Clips | Surface cable organization |
| Conduit | Outdoor cable protection |
| Wall Mount | Dish mounting |
| Pipe Adapter | Pole installation |
| Surge Protector | Power protection |
| Feature | Cable Routing Kit | Conduit |
|---|---|---|
| Wall entry sealing | Excellent | |
| Long outdoor cable protection | Moderate | |
| Cable organization | Good | |
| Best use | Indoor/outdoor entry point | |
| Permanent outdoor route | Better with conduit added |
| Need | Recommended Kit |
|---|---|
| Wooden wall | Standard kit |
| Drywall | Standard kit |
| Concrete wall | Masonry kit |
| Hard coat stucco | Masonry kit |
| Office block wall | Masonry kit |
| Light residential wall | Standard kit |
| User Need | Recommended Solution |
|---|---|
| Passing cable through wooden wall | Standard Cable Routing Kit |
| Passing cable through concrete | Masonry Routing Kit |
| Long outdoor cable run | Routing kit + conduit |
| Clean indoor cable layout | Routing kit + wall clips |
| Professional office install | Routing kit + installer support |
The Cable Routing Kit works best as part of a complete installation plan that may also include conduit, wall clips, mounts, and professional cable routing.
When buying a Starlink Cable Routing Kit, many users assume that drilling a wall is simple. However, the wrong drilling location, wrong kit type, poor sealing, or careless cable pulling can cause serious problems such as wall damage, water leakage, electrical hazards, cable breakage, and unstable Starlink performance.
This is why buying from Starlite Internet Kenya is a better choice. Starlite helps customers determine whether they need the standard cable routing kit, masonry routing kit, conduit, extra wall clips, cable protection, or professional installation support depending on the building type and wall material.
Starlite Internet Kenya also assists customers with cable route planning, wall entry selection, obstruction checks, dish mounting advice, router placement, Wi-Fi planning, and full Starlink setup guidance. This is especially important for homes, offices, lodges, farms, apartments, schools, clinics, and construction sites where a clean and protected cable route directly affects installation quality.
For Kenyan users, Starlite Internet Kenya provides practical installation guidance suited for local wall types, rooftop structures, outdoor conditions, and long-term Starlink reliability.
It is an installation kit used to route Starlink cable through walls while protecting and sealing the cable entry point.
The kit commonly includes a 3/4 inch spade bit, drill bit, cable routing tool, silicone sealant, grommets, and wall clips.
The standard kit is not recommended for masonry, concrete, or hard coat stucco. A masonry routing kit should be used for those surfaces.
For standard wall routing, a drill and stud/electrical finder are recommended.
Silicone helps seal the wall opening to reduce water, dust, and insect entry.
Grommets protect the cable from rubbing against the drilled wall hole.
Yes, but it is best for users comfortable with drilling through walls and checking for hidden wiring or pipes.
Yes. Starlink’s guide instructs users to unplug Starlink before beginning the installation process.
A Kenyan listing shows the kit at around KSh 18,000, including shipping and handling.
Yes, it can be used where a Starlink Mini cable needs to pass through a wall, provided the cable route and wall type are suitable.
Yes, especially for masonry walls, office buildings, apartments, lodges, and permanent installations.
From Starlite Internet Kenya for genuine accessories, cable routing guidance, installation support, and nationwide Starlink assistance.
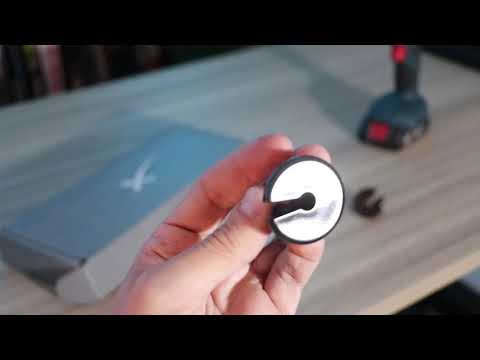
The video above demonstrates how the Starlink Cable Routing Kit helps users route Starlink cables through walls in a cleaner and safer way. It shows why proper drilling, cable protection, grommet placement, and sealing are important for a professional installation.
It also highlights key installation considerations such as choosing the right wall entry point, checking for hidden electrical wiring or pipes, drilling carefully, using the cable routing tool, applying silicone sealant, and securing the cable with clips. These details matter because poor cable routing can lead to water ingress, cable abrasion, wall damage, and Starlink connectivity issues.
For Kenyan users, this video is especially useful for planning Starlink installations in homes, offices, apartments, farms, lodges, schools, clinics, and construction sites where the dish is mounted outside and the router or power equipment needs to remain indoors.
The Starlink Cable Routing Kit is one of the most useful accessories for creating a clean, safe, and professional Starlink installation. It helps protect the cable, seal the wall entry point, organize the cable path, and reduce installation risks.
It improves:
cable protection
wall entry sealing
installation cleanliness
moisture resistance
cable organization
long-term reliability
professional appearance
For genuine Starlink Cable Routing Kits, cable routing guidance, wall drilling advice, installation support, and nationwide Starlink setup assistance, visit Starlite Internet Kenya and let Starlite Internet Kenya help you build a clean and reliable Starlink installation anywhere in Kenya.
Hello! How can we help you today?
Start Chat
