Starlink V4 Mount Kenya – Ultra-Detailed Gen 3 / Standard 4X Installation Guide 2026 The Starlink V4 Mount is an essential accessory for users installing the Starlink Standard Kit Gen 3 / Standard 4X / V4 on rooftops, exterior walls,...
The Starlink V4 Mount is an essential accessory for users installing the Starlink Standard Kit Gen 3 / Standard 4X / V4 on rooftops, exterior walls, fascia boards, balconies, gables, and elevated structures. It helps position the Starlink dish higher and more securely so it can achieve a clearer view of the sky, reduce obstructions, and improve long-term internet stability.
The Starlink Standard Wall Mount is designed for installation on an exterior wall near the top of a gable or fascia, and it can accommodate a 4-inch overhang maximum. Starlink’s own installation guide also emphasizes installing directly into a structural beam, drilling pilot holes with a 6 mm / 1⁄4 inch drill bit, applying silicone sealant, routing the cable through the mast, and inserting the mast base until it clicks into place.
In Kenya, the Starlink V4 Mount is ideal for:
Homes
Offices
Apartments
Lodges
Shops
Farms
Schools
Clinics
Rural sites
Rooftop Starlink installations
Wall-mounted Starlink deployments
Obstructed compounds with trees or nearby buildings
| Mount Type | Estimated Kenya Price | Best Use |
|---|---|---|
| Starlink V4 / Gen 3 Wall Mount | KSh 6,000 – 15,000 | Homes and offices |
| Adjustable Gen 3 Mount Kit | KSh 8,000 – 20,000 | Rooftop and wall setups |
| Stainless Steel Pipe Adapter | KSh 9,500 – 18,000 | Pole and custom mounts |
| Heavy-Duty Wall Mount | KSh 12,000 – 25,000 | Windy or exposed areas |
| Full Mount + Installation Package | KSh 18,000 – 45,000 | Professional installations |
Kenyan listings show Starlink Gen 3 / V4 wall mounts from about KSh 5,999 – KSh 9,500+, depending on design, material, supplier, and whether installation is included.
| Component | Basic Home Setup | Rooftop Setup | Office Setup |
|---|---|---|---|
| Starlink V4 Mount | KSh 6,000 | KSh 12,000 | KSh 18,000 |
| Installation Labour | KSh 5,000 | KSh 15,000 | KSh 30,000 |
| Cable Routing | KSh 2,000 | KSh 8,000 | KSh 20,000 |
| Silicone / Sealant | KSh 500 | KSh 1,000 | KSh 2,000 |
| Surge Protection | Optional | KSh 5,000 | KSh 15,000 |
| Estimated Total | KSh 13,500 | KSh 41,000 | KSh 85,000 |
| Installation Scenario | Without Proper Mount | With V4 Mount |
|---|---|---|
| Obstructed compound | Frequent interruptions | Better sky visibility |
| Weak temporary setup | Risk of movement | Stable installation |
| Poor cable routing | Cable damage risk | Cleaner routing |
| No sealant | Water ingress risk | Better waterproofing |
| Low placement | More obstructions | Higher placement |
The Starlink V4 Mount is a small investment that can greatly improve signal stability, installation safety, and long-term Starlink performance.
| Starlink Kit | Compatible with V4 Mount |
|---|---|
| Starlink Standard Gen 3 | Yes |
| Starlink Standard 4X | Yes |
| Starlink V4 Kit | Yes |
| Starlink Mini | No, different mounting system |
| Standard Actuated Gen 2 | No, different mount design |
| Flat High Performance | No, different mount system |
The V4 / Gen 3 Standard Kit uses software-assisted manual orientation, has a 110° field of view, weighs about 2.9 kg, and is designed for permanent or semi-permanent mounting after removing the kickstand.
| Installation Area | Suitability |
|---|---|
| Exterior wall | Excellent |
| Fascia board | Excellent |
| Gable end | Excellent |
| Balcony side wall | Good |
| Rooftop side structure | Excellent |
| Concrete wall | Good with proper anchors |
| Weak timber | Not recommended |
| Mount Type | Best For | Installation Difficulty |
|---|---|---|
| Wall Mount | Homes and offices | Moderate |
| Pole Adapter | Existing poles | Easy to moderate |
| Roof Mount | Open rooftops | Moderate |
| Adjustable Mount | Custom positioning | Moderate |
| Temporary Kickstand | Short-term use | Easy |
Starlink states that its Standard Wall Mount offers a secure, long-reaching platform for improved placement and better connectivity performance.
The Starlink V4 Mount is mainly designed for Standard Gen 3 / Standard 4X installations, especially where the kickstand is not suitable for long-term use.
| Feature | Specification |
|---|---|
| Product Type | Wall / rooftop mount |
| Compatible Kit | Starlink Standard Gen 3 / V4 / 4X |
| Installation Surface | Wall, fascia, gable, roof edge |
| Overhang Support | Up to 4 inches |
| Cable Routing | Through mast |
| Installation Hardware | Screws, mount, mast adapter, sealant depending on package |
| Best Use | Permanent installations |
| Requirement | Details |
|---|---|
| Clear sky view | Essential |
| Structural beam | Recommended |
| 6 mm pilot holes | Required in official guide |
| Silicone sealant | Recommended |
| Cable routing through mast | Recommended |
| App alignment | Required after installation |
Starlink’s official wall mount guide instructs users to mark pilot holes, drill using a 6 mm / 1⁄4 inch drill bit, apply silicone inside and over the holes, screw in the mount, route the cable through the mast, plug in the cable, and install the mast.
| Condition | Suitability |
|---|---|
| Heavy rain | Excellent with proper sealing |
| Strong sun | Excellent |
| Wind | Good with proper fixing |
| Coastal humidity | Good with corrosion-resistant materials |
| Dusty areas | Excellent |
| Rural rooftops | Excellent |
| Feature | Benefit |
|---|---|
| Elevated placement | Better signal |
| Fixed wall support | Reduced movement |
| Cable-through-mast design | Cleaner installation |
| Proper beam fixing | Better strength |
| Sealant use | Water protection |
| App-assisted alignment | Better performance |
A good V4 mount should provide strong physical support, weather resistance, clean cable routing, and safe long-term placement.
| Step | Action |
|---|---|
| 1 | Use the Starlink app to identify the best clear-sky location |
| 2 | Choose a wall, gable, fascia, or rooftop edge |
| 3 | Remove the kickstand from the Starlink V4 dish |
| 4 | Mark pilot holes directly over a structural beam |
| 5 | Drill holes using a 6 mm / 1⁄4 inch drill bit |
| 6 | Apply silicone sealant inside and around holes |
| 7 | Screw the mount securely into place |
| 8 | Route the Starlink cable through the mast |
| 9 | Plug cable into the Starlink dish |
| 10 | Insert mast until it clicks into place |
| 11 | Align using the Starlink app |
| 12 | Run speed and obstruction tests |
| Tool / Item | Purpose |
|---|---|
| Drill | Pilot holes |
| 6 mm drill bit | Official pilot hole size |
| Marker | Hole marking |
| Silicone sealant | Waterproofing |
| Screwdriver / driver | Tightening screws |
| Ladder | Rooftop access |
| Cable clips | Cable management |
| Starlink app | Alignment and obstruction check |
| Checklist Item | Why It Matters |
|---|---|
| Structural beam confirmed | Prevents mount failure |
| Cable route protected | Prevents cable damage |
| Mount sealed properly | Prevents leaks |
| Dish has clear sky | Reduces interruptions |
| Router placed correctly | Better WiFi |
| Speed test completed | Confirms performance |
| Obstruction test completed | Confirms stability |
| Mistake | Result |
|---|---|
| Mounting on weak board | Mount instability |
| Skipping sealant | Water ingress |
| Poor cable routing | Cable wear |
| Mounting near trees | Frequent interruptions |
| Loose screws | Dish movement |
| Poor router placement | Weak WiFi |
Proper installation matters more than the mount itself. A good mount installed poorly can still lead to signal drops, leaks, and long-term instability.
| Home Type | Suitability |
|---|---|
| Bungalow | Excellent |
| Maisonette | Excellent |
| Apartment balcony wall | Good |
| Rural home | Excellent |
| Farmhouse | Excellent |
| Townhouse | Excellent |
| Business Type | Suitability |
|---|---|
| Small office | Excellent |
| Shop | Excellent |
| Lodge | Excellent |
| School | Excellent |
| Clinic | Excellent |
| Construction site | Good |
| Farm office | Excellent |
| Location Type | Recommendation |
|---|---|
| Nairobi estates | Wall or fascia mount |
| Rural homes | Pole or wall mount |
| Coastal homes | Corrosion-resistant mount |
| Lodges | Professional rooftop installation |
| Farms | Elevated wall or pole mount |
| Offices | Wall mount plus surge protection |
| Obstruction | Mounting Solution |
|---|---|
| Trees | Higher wall or pole mount |
| Nearby building | Fascia/gable mount |
| Roof overhang | Long wall mount |
| Low compound | Pole adapter |
| Balcony limitation | Side wall mount |
The Starlink V4 Mount is especially useful in Kenya because many homes and businesses need elevated placement to avoid trees, rooftops, walls, and nearby buildings.
| Mounting Option | Best Use | Stability |
|---|---|---|
| Kickstand | Temporary setup | Low |
| Wall Mount | Permanent home/office setup | High |
| Pole Mount | Obstructed areas | High |
| Roof Mount | Open roof installation | High |
| Ridgeline Mount | Non-penetrating roof setups | Medium to high |
| Feature | Kickstand | V4 Mount |
|---|---|---|
| Permanent use | Not ideal | Excellent |
| Wind stability | Moderate | Better |
| Cable protection | Limited | Better |
| Obstruction avoidance | Limited | Better |
| Professional appearance | Low | High |
| Feature | Wall Mount | Pole Mount |
|---|---|---|
| Best for | Fascia/gable walls | Open compounds |
| Installation complexity | Moderate | Moderate |
| Height flexibility | Moderate | High |
| Cost | Lower | Higher |
| Stability | High | High if installed properly |
The V4 wall mount is one of the best options for clean, permanent, and affordable Starlink installations.
| Accessory | Importance | Purpose |
|---|---|---|
| Cable clips | High | Clean cable routing |
| Surge protector | High | Equipment safety |
| UPS backup | High | Prevents downtime |
| Ethernet cable | Medium | Wired networking |
| Mesh router | Medium | WiFi expansion |
| Silicone sealant | Essential | Waterproofing |
| Outdoor conduit | Medium | Cable protection |
| Accessory | Estimated Kenya Price |
|---|---|
| Cable clips | KSh 500 – 2,000 |
| Silicone sealant | KSh 500 – 1,500 |
| Surge protector | KSh 3,000 – 15,000 |
| UPS backup | KSh 15,000 – 100,000 |
| Mesh router | KSh 15,000 – 30,000 |
| Outdoor conduit | KSh 1,000 – 5,000 |
| Use Case | Recommended Accessories |
|---|---|
| Home | Cable clips + UPS |
| Office | UPS + surge protector + Ethernet |
| Lodge | UPS + mesh WiFi + outdoor conduit |
| Coastal installation | Corrosion-resistant screws |
| Rural home | Pole option + surge protection |
The right accessories improve installation safety, protect equipment, and extend the lifespan of your Starlink V4 setup.
Faster delivery,flexible payment options and professional installation.
| Feature | Starlite Internet Kenya | Random Sellers |
|---|---|---|
| Genuine mounts | Yes | Not guaranteed |
| Correct compatibility guidance | Yes | Limited |
| Professional installation | Yes | Rare |
| Cable routing support | Yes | Limited |
| After-sales support | Yes | Weak |
| Nationwide service | Yes | Limited |
| Benefit | Advantage |
|---|---|
| Correct mount selection | Avoids wrong accessory purchases |
| Professional installation | Better stability and safety |
| Router placement advice | Better WiFi performance |
| Cable management | Cleaner installation |
| Power backup planning | Reduced downtime |
| Local support | Easier troubleshooting |
Buying from Starlite Internet Kenya helps ensure your Starlink V4 Mount is compatible, professionally installed, and optimized for reliable long-term performance.
It is a mounting accessory designed for Starlink Standard Gen 3 / Standard 4X / V4 installations on walls, fascia boards, gables, rooftops, and elevated structures.
Yes. The Starlink V4 Mount is commonly used with the Standard Gen 3 / Standard 4X dish.
No. The Starlink Mini uses a different mounting ecosystem.
No. Standard Actuated Gen 2 uses a different mounting design.
Common pricing ranges from about KSh 6,000 to KSh 15,000+, depending on mount type and supplier.
Yes. Starlink’s Standard Wall Mount is designed for exterior wall installation near the top of a gable or fascia.
Yes. Starlink states the Standard Wall Mount can accommodate a 4-inch maximum overhang.
Yes. The official guide instructs users to drill pilot holes using a 6 mm / 1⁄4 inch drill bit.
Yes. Starlink’s wall mount guide recommends applying silicone inside and over the drilled holes.
Yes, but professional installation is recommended for rooftops, high walls, and difficult locations.
A mount gives better stability, better cable routing, better obstruction clearance, and a cleaner permanent installation.
From Starlite Internet Kenya.
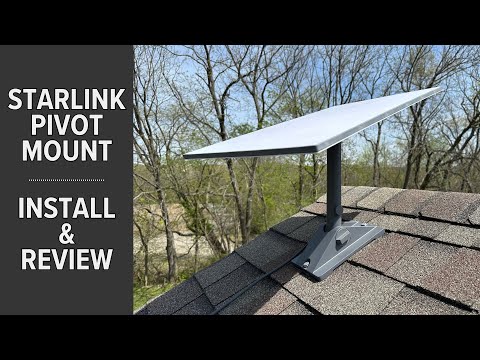
The video above demonstrates how the Starlink V4 Mount helps users install the Standard Gen 3 / Standard 4X dish more securely on walls, rooftops, fascia boards, and elevated surfaces. It shows why proper mounting is important for reducing obstructions, preventing movement, and improving Starlink performance.
It also explains key installation considerations such as choosing a clear-sky location, removing the kickstand, marking pilot holes, routing the cable, tightening the mast, and checking final alignment through the Starlink app. These steps matter because Starlink performance depends heavily on clear sky visibility and installation stability.
For Kenyan users, the video is useful for planning installations in homes, offices, lodges, schools, farms, rural properties, and businesses where a stable permanent mount is better than relying on the temporary kickstand setup.
The Starlink V4 Mount is one of the most important accessories for installing the Starlink Standard Gen 3 / Standard 4X kit safely, cleanly, and permanently. It improves dish placement, reduces obstruction problems, protects cables, and gives the Starlink system a more stable long-term installation.
It is ideal for Kenyan homes, offices, lodges, farms, schools, clinics, apartments, and rural deployments where proper elevation and strong mounting are essential for reliable Starlink internet performance.
For genuine Starlink V4 Mounts, professional rooftop installation, wall mounting, cable routing, obstruction checks, and nationwide Starlink installation support, visit Starlite Internet Kenya and let Starlite Internet Kenya help you install your Starlink system professionally anywhere in Kenya.
Hello! How can we help you today?
Start Chat