Starlink Installation on Roof in Kenya: Everything You Should Know
Satellite internet is transforming connectivity across Kenya, especially in areas where traditional fiber or mobile networks struggle to deliver reliable service. Starlink, the satellite internet solution developed by SpaceX, brings high-speed, low-latency internet directly to homes, offices, and remote locations. For many users, mounting the Starlink dish on the roof provides the best possible signal, allowing uninterrupted access to the satellite network and maximizing internet performance.
Proper roof installation is essential to ensure a strong, stable connection. A clear line of sight to the sky, free from trees, walls, or other obstructions, is critical for Starlink’s low-earth-orbit satellites to function efficiently. This includes selecting the right location on the roof, securely mounting the dish, and connecting it safely to the Starlink router. Following best practices during installation helps prevent signal interruptions, protects equipment from weather damage, and ensures a long-lasting, reliable service.
Installing Starlink on your roof in Kenya can seem challenging, but with the right guidance, it becomes a manageable and rewarding process. This approach not only prioritizes safety but also helps users optimize connectivity for all devices in the home or office. By understanding the installation requirements and taking careful measures, Starlink users can enjoy fast, dependable satellite internet wherever they are, unlocking the full potential of modern connectivity.
1. Understanding Roof Installation for Starlink
Roof installation is widely regarded as the most effective setup for Starlink internet. Positioning the dish at an elevated location reduces obstructions, enhances signal reception, and ensures more stable connectivity. For Kenyan homes, businesses, and remote sites, roof-mounted installations provide significant advantages over ground-level setups.
1.1 Why Roof Installation Provides the Best Signal Reception
Installing the Starlink dish on the roof allows it to maintain a clear line-of-sight to the sky, which is critical for low-earth orbit satellite connectivity.
Key Points:
Elevated Position: The higher the dish, the fewer obstacles, such as trees, buildings, or walls interfere with the signal.
Improved Latency and Speeds: Reduced obstructions lead to more stable connections and consistent high-speed internet.
Minimized Downtime: Clear sightlines reduce interruptions from temporary blockages like vehicles or people walking nearby.
Conclusion: Roof installation maximizes performance and ensures reliable Starlink connectivity in both urban and rural Kenyan settings.
1.2 Differences Between Ground-Level and Roof-Mounted Starlink Setups
While Starlink can technically be installed at ground level, performance may be compromised compared to elevated setups.
Key Points:
Ground-Level: Easier access for installation and maintenance, but more prone to obstructions. May experience slower speeds or intermittent connectivity.
Roof-Mounted: Offers unobstructed satellite view, better signal strength, and higher overall reliability.
Urban vs Rural Considerations: In cities with tall buildings or in areas with dense vegetation, roof placement is often the only way to ensure strong, uninterrupted service.
Roof installation generally outperforms ground setups in terms of speed, latency, and stability.
1.3 Common Challenges in Roof Installations
Roof installations are not without challenges, particularly in Kenyan homes and businesses.
Key Points:
Height and Accessibility: Working on rooftops requires ladders or safety harnesses, which can complicate installation.
Safety Risks: Falls or injuries are possible if proper precautions are not taken.
Structural Considerations: Some roofs may not support mounting brackets or need reinforcement to secure the dish.
Weather Exposure: Roof-mounted dishes are more exposed to wind, rain, and extreme temperatures, which may affect durability if not properly installed.
While offering superior performance, roof installations require careful planning, safety measures, and sometimes additional equipment.
1.4 Benefits of Professional Installation for Residential and Business Users in Kenya
Professional installation ensures that the Starlink system is positioned correctly and safely, avoiding common pitfalls.
Key Points:
Optimized Line-of-Sight: Experts ensure the dish has an unobstructed view to satellites for maximum speed and reliability.
Secure Mounting: Professionals install brackets and mounts safely, preventing damage to roofs or the dish.
Time Efficiency: Experienced technicians can install quickly, reducing downtime for homes or businesses.
Peace of Mind: Reduces the risk of errors, accidents, or future connectivity issues.
Hiring professional installers in Kenya guarantees a reliable, high-performance Starlink setup while maintaining safety and structural integrity.
Roof installation is the preferred choice for Starlink in Kenya, offering superior signal strength, consistent speeds, and reliable connectivity. While it comes with challenges such as height, safety, and weather exposure, professional installation mitigates these risks. For both residential and business users, a well-executed roof setup ensures that Starlink can deliver its full potential across urban, suburban, and remote locations.
2. Pre-Installation Requirements for Starlink in Kenya
Before mounting a Starlink dish on your roof, it’s essential to prepare adequately. Proper pre-installation checks ensure a safe setup, optimal signal reception, and long-term reliability for both homes and businesses across Kenya.
2.1 Ensuring the Roof Can Support the Starlink Dish and Mount
Not all roofs are immediately suitable for a satellite dish installation, so structural assessment is crucial.
Weight Consideration: The Starlink dish and mounting hardware are lightweight but require a stable, reinforced surface.
Roof Material: Concrete, metal, or tiled roofs may need specific brackets or anchors to prevent damage.
Avoid Weak Points: Avoid areas prone to leaks or structural fragility to ensure safety and longevity.
Confirming that the roof can safely support the dish prevents future damage and ensures a secure installation.
2.2 Checking Line-of-Sight to the Sky
A clear line-of-sight is critical for Starlink’s low-earth orbit satellites to deliver high-speed internet.
Avoid Obstructions: Trees, tall buildings, chimneys, or poles can block the signal and reduce connectivity.
Optimal Placement: Roof ridges or elevated sections often provide the best view of the sky.
Sun Path & Shadows: Consider seasonal sun angles and shadow patterns that may temporarily block the signal.
Proper line-of-sight planning maximizes performance and ensures consistent internet speeds.
2.3 Preparing Necessary Tools and Safety Equipment
Safety and efficiency depend on having the right tools and equipment before installation.
Safety Gear: Harnesses, gloves, helmets, and non-slip footwear to protect installers.
Pre-Assembly Checks: Confirm all components of the Starlink kit are included and functional.
Being fully equipped minimizes installation errors and enhances safety during roof setup.
2.4 Verifying Electrical Outlets and Power Supply
A reliable power source is essential for uninterrupted Starlink operation.
Proximity: Ensure outlets are near the installation site to avoid long cable runs.
Voltage & Stability: Verify that the electrical supply is stable to prevent damage to the router or dish.
Backup Options: For remote areas, consider power backups or surge protection to safeguard equipment.
Proper power preparation guarantees consistent connectivity and protects hardware from electrical issues.
Pre-installation preparation is vital for a successful Starlink roof setup in Kenya. By assessing roof stability, ensuring a clear line-of-sight, preparing tools and safety gear, and confirming a reliable power supply, users can achieve a safe and high-performance installation. These steps minimize risks and ensure that the Starlink system delivers optimal internet speeds and reliability.
3. Choosing the Right Roof Location for Starlink
Selecting the ideal location on your roof is critical to ensure the Starlink dish operates at peak performance. Proper placement reduces connectivity interruptions, protects the hardware, and simplifies installation and maintenance.
3.1 Selecting a Spot with Minimal Obstruction to Satellites
The most important factor for Starlink performance is an unobstructed line-of-sight to the sky.
Avoid Physical Obstacles: Trees, chimneys, neighboring buildings, and antennas can block satellite signals.
Elevated Points: Roof ridges or high corners often provide the clearest view of the sky.
Satellite Path: Consider the path of low-earth orbit satellites, ensuring the dish has a broad sky view in all directions.
Picking a spot with minimal obstruction maximizes download/upload speeds and minimizes connection drops.
3.2 Considering Roof Materials and Surface for Secure Mounting
Roof material and structure determine how safely and securely the dish can be installed.
Concrete or Tile Roofs: Require specific anchors and brackets for stability.
Metal Roofs: May need non-penetrating clamps to avoid leaks.
Flat vs Sloped Roofs: Sloped roofs may need angled mounts to maintain correct dish orientation.
Structural Integrity: Ensure the section chosen can handle the weight and mounting hardware without damage.
Matching mounting techniques to the roof type ensures durability and protects both the dish and the roof.
3.3 Accounting for Weather Exposure, Wind, and Rain
Roof-mounted Starlink dishes are exposed to environmental factors that can affect performance and longevity.
Wind Resistance: Mounting should withstand strong winds common in certain Kenyan regions.
Rain & Drainage: Avoid areas prone to water pooling to prevent corrosion or leaks.
Sun Exposure: While Starlink dishes are designed for outdoor use, excessive heat may slightly affect electronic components over time.
Proper placement and mounting protect the dish from weather hazards and extend its service life.
3.4 Planning Cable Routing to the Interior Network or Router
Once the dish is mounted, cables must safely reach the router inside the building.
Shortest Path: Plan the most direct route to minimize cable length and signal degradation.
Protection: Use conduits or clips to shield cables from sun, rain, and physical damage.
Aesthetic & Safety: Ensure cables are secured neatly to prevent tripping hazards or unsightly lines.
Accessibility: Plan routing that allows future maintenance without major dismantling.
Thoughtful cable routing ensures reliable connectivity while maintaining safety and a clean installation.
Choosing the right roof location is crucial for optimal Starlink performance in Kenya. By prioritizing unobstructed sky access, matching mounting methods to roof material, accounting for weather conditions, and carefully planning cable routing, users can achieve a stable, high-speed, and long-lasting installation. Proper planning at this stage reduces future maintenance and maximizes the value of the Starlink system.
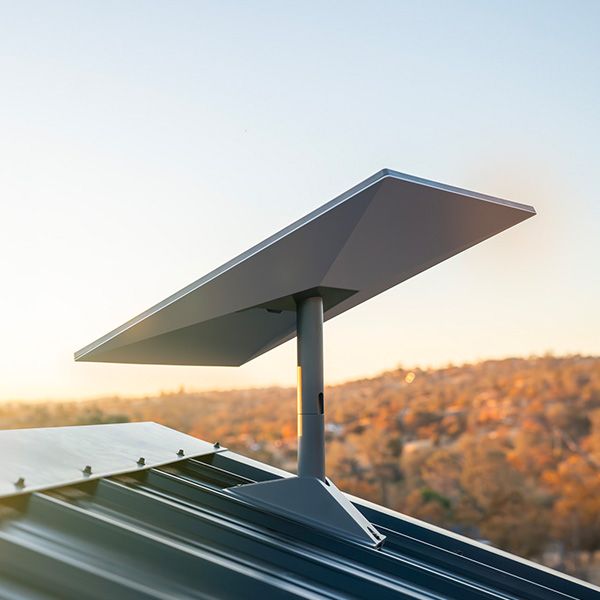
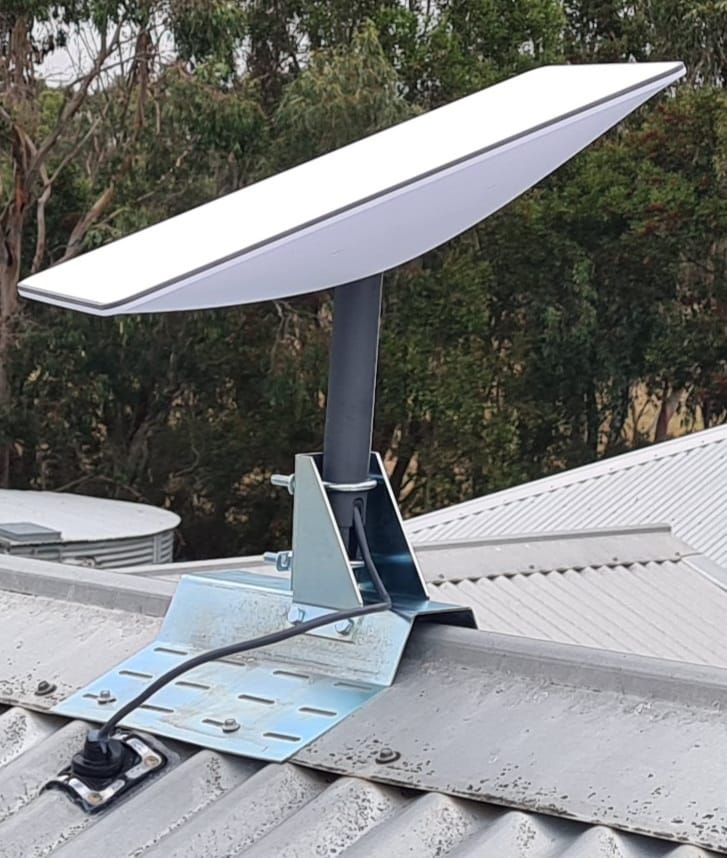
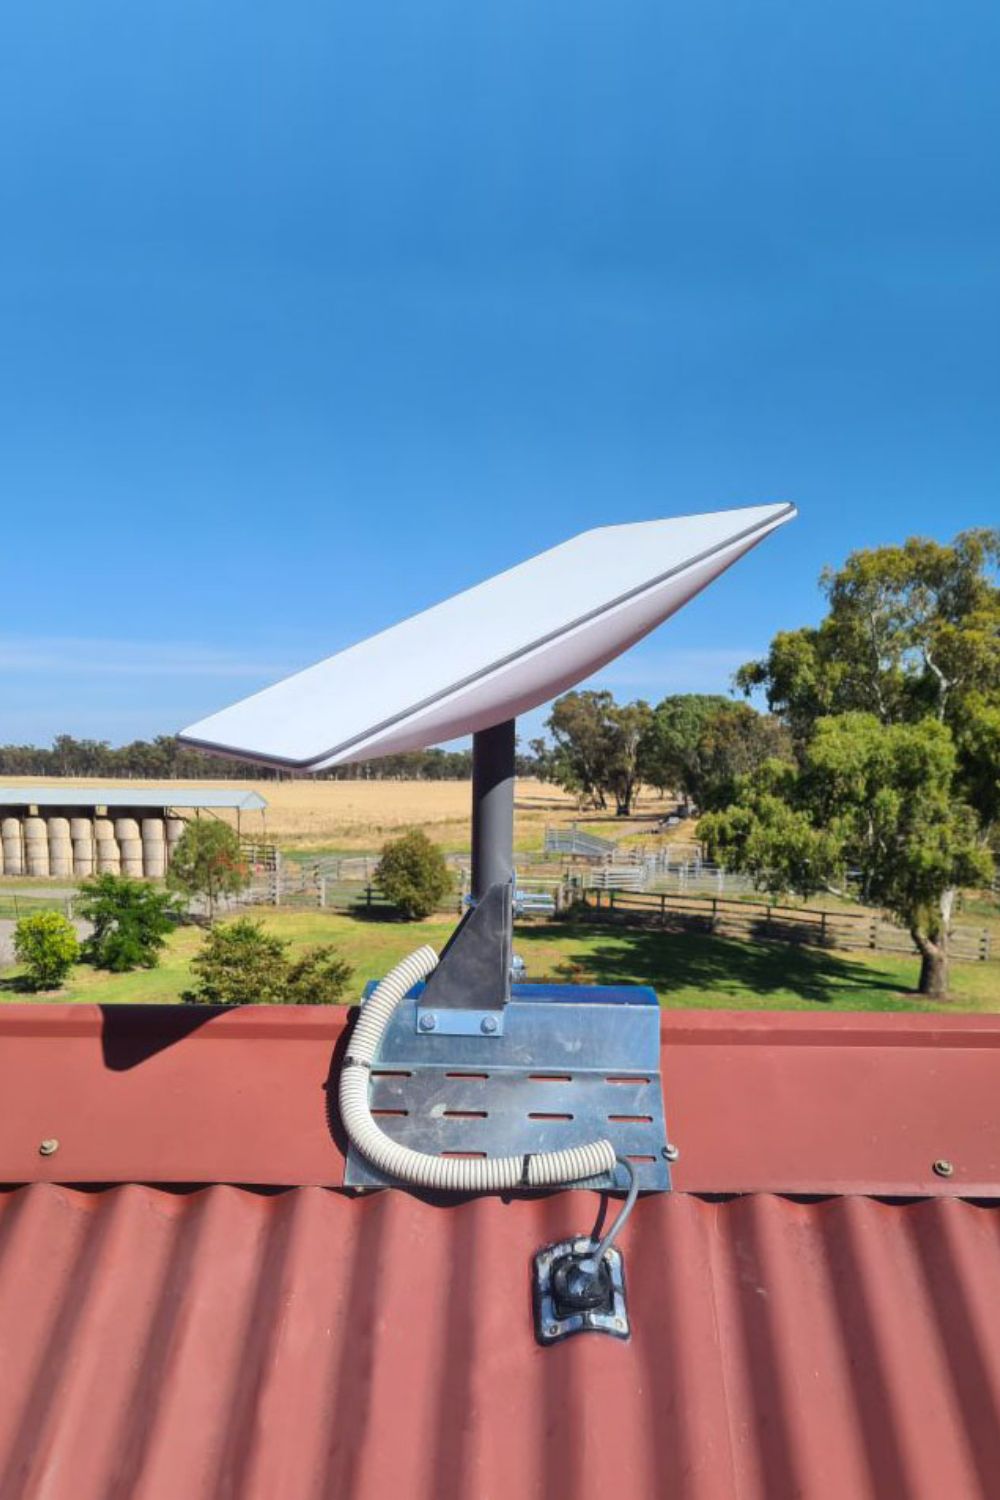
4. Mounting the Starlink Dish on the Roof
Proper mounting of the Starlink dish is critical for maintaining a stable connection, withstanding weather conditions, and ensuring optimal satellite alignment. The choice of mount and installation technique directly affects signal quality and long-term reliability.
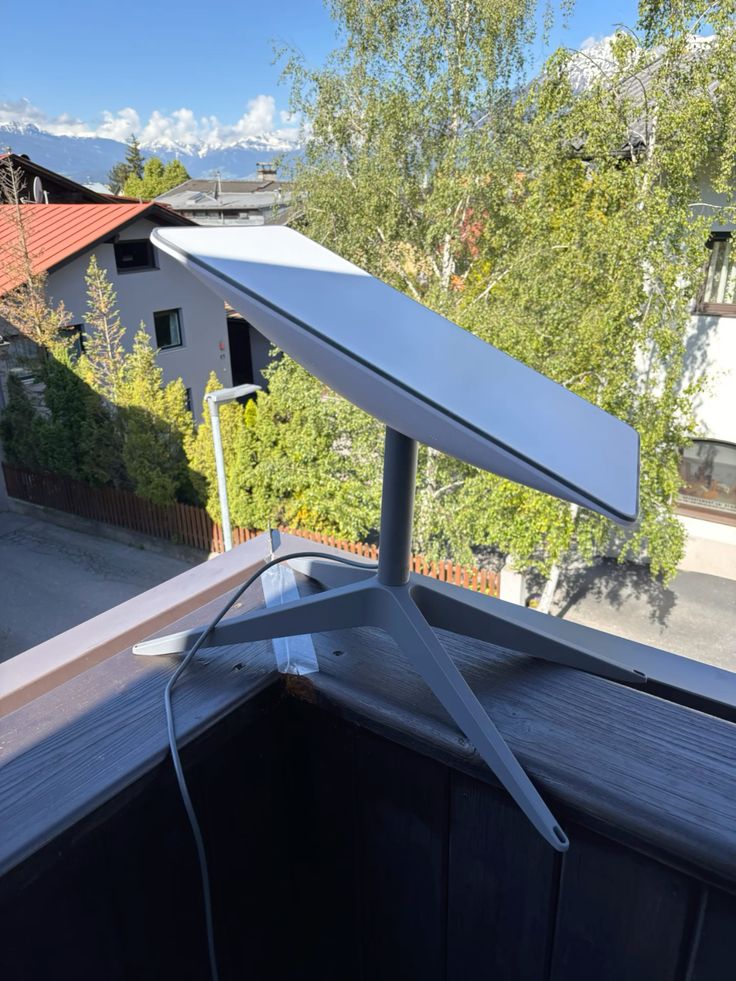
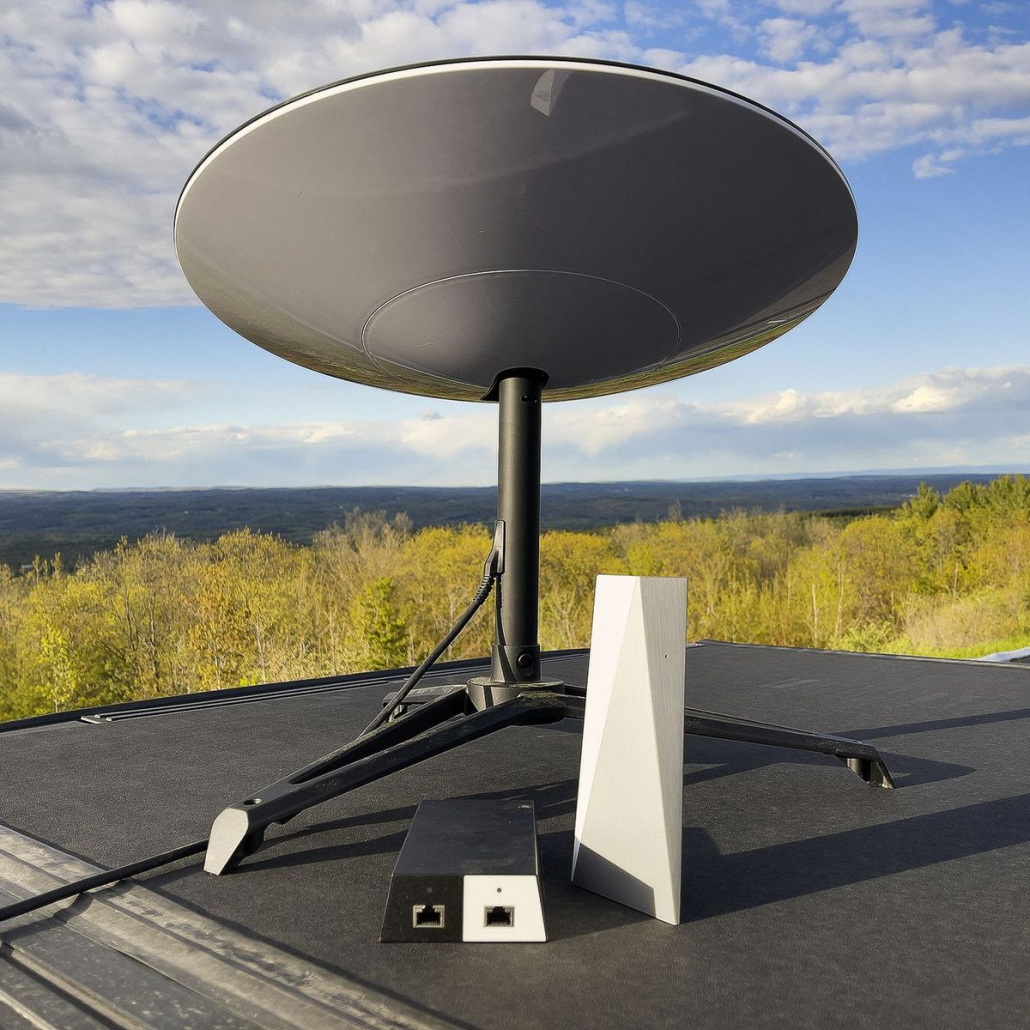
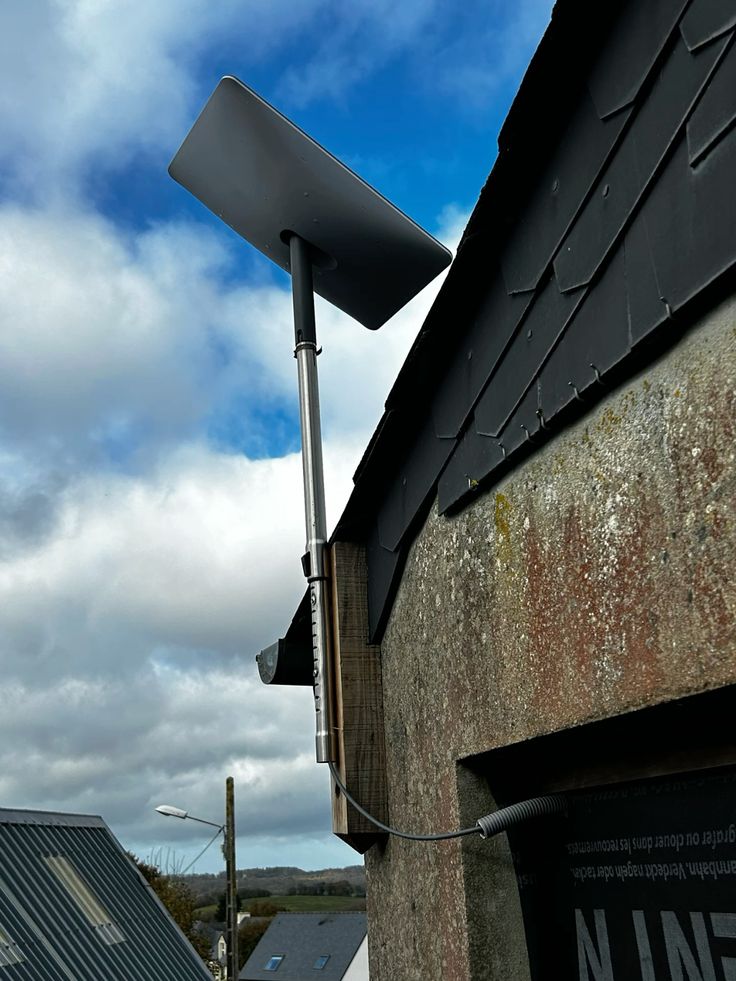
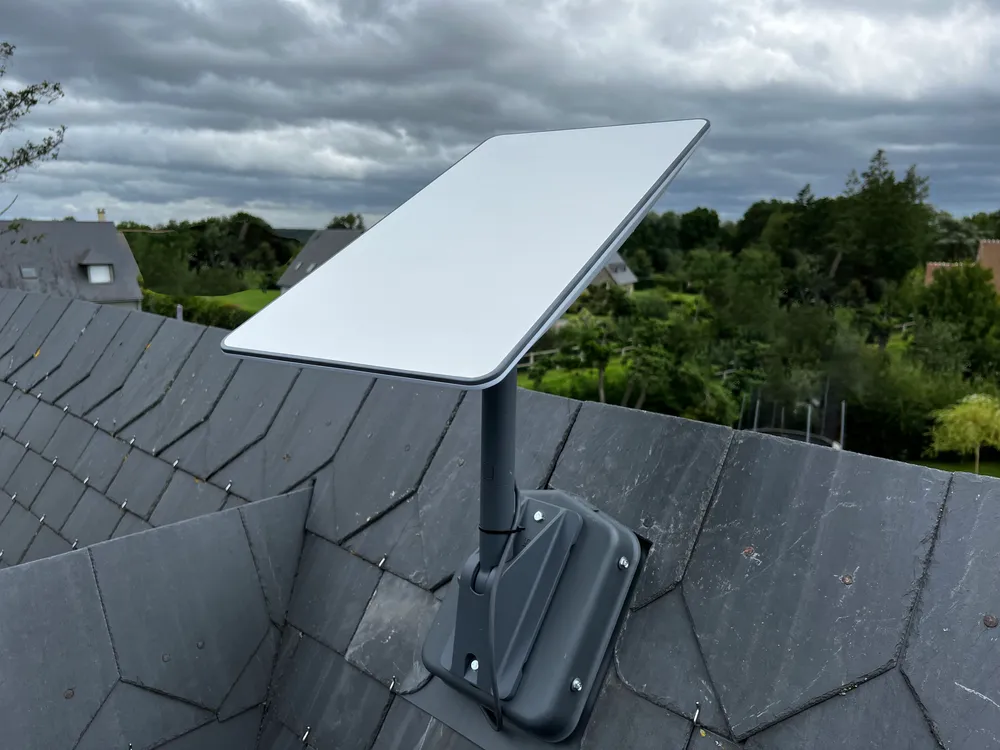
4.1 Types of Mounts for Roof Installation
Starlink dishes can be installed using different mounting options depending on roof type and user needs.
Tripod Mounts: Flexible and ideal for temporary or portable setups; allows easy adjustment of angles.
Pole Mounts: Durable vertical poles that provide height above obstacles, suitable for sloped or flat roofs.
Flat-Surface Brackets: Designed for direct attachment to roof surfaces; offers a stable and permanent installation.
Custom Solutions: Some roofs may require angled or reinforced mounts for unique structures or difficult terrains.
Selecting the right mount type ensures both stability and optimal positioning for satellite reception.
4.2 Securing the Mount Properly to Prevent Dish Movement
Even slight movement can disrupt connectivity, so secure installation is essential.
Anchor Points: Use strong, weather-resistant bolts or screws suitable for roof material.
Reinforcement: For heavier dishes or exposed locations, additional braces or supports may be needed.
Vibration Control: Tighten mounts to prevent wobbling during wind or heavy rain.
Routine Check: Periodically inspect mounts to ensure long-term stability.
4.3 Adjusting the Tilt and Azimuth Angle for Optimal Satellite Alignment
Correct dish orientation ensures that signals from LEO satellites are consistently received.
Tilt Angle: Adjust based on latitude and elevation to face the optimal portion of the sky.
Azimuth Direction: Orient the dish to match the satellite constellation path for maximum coverage.
Fine-Tuning: Small adjustments can significantly improve signal strength and reduce latency.
App Assistance: Use the Starlink app to verify signal quality during alignment.
Precise alignment of tilt and azimuth angles maximizes download/upload speeds and ensures stable connectivity.
4.4 Peak Audio Tips: Using Sturdy Materials and Professional-Grade Mounts for Kenyan Conditions
Installing for Kenya’s environment requires attention to local weather and building materials.
Materials: Choose corrosion-resistant brackets and stainless-steel fasteners to withstand rain and humidity.
Wind Resistance: Use reinforced mounts for areas prone to strong winds, especially in coastal or elevated regions.
Professional Installation: Experts ensure that mounts are properly positioned, aligned, and secured to prevent future connectivity issues.
Long-Term Durability: Quality materials and professional installation reduce wear and tear from weather and seasonal changes.
Using high-quality materials and professional-grade mounts ensures that the Starlink dish remains secure, functional, and reliable in all Kenyan conditions.
Mounting the Starlink dish correctly is essential for optimal performance in Kenya. Choosing the appropriate mount, securing it firmly, aligning the dish precisely, and using durable, weather-resistant materials all contribute to stable connectivity, high speeds, and longevity of the system. Professional installation can further guarantee that the setup withstands local environmental challenges while providing a seamless internet experience.
5. Connecting the Starlink Dish to the Router
Properly connecting the Starlink dish to the router is critical for ensuring stable internet connectivity throughout your home or business. Careful cable routing, protection, and router placement all affect network performance and device longevity.
5.1 Running the Starlink Cable from the Dish to the Router
The connection between the outdoor dish and the indoor router requires careful planning.
Shortest Path: Identify the most direct route to minimize signal loss and reduce cable length.
Entry Points: Use pre-existing cable conduits or drill a small, weather-sealed entry point into the building.
Avoid Sharp Bends: Keep cables straight or gently curved to prevent damage to internal wires.
Future Access: Plan for easy maintenance or upgrades without dismantling the entire setup.
Thoughtful cable routing ensures a reliable connection and simplifies troubleshooting.
5.2 Protecting Cables from Weather, Rodents, and UV Exposure
Outdoor cables are exposed to environmental hazards that can degrade performance over time.
Weatherproofing: Use conduits, cable trays, or waterproof sleeves to shield from rain and humidity.
UV Protection: Prolonged sun exposure can weaken cable insulation; protective coverings are recommended.
Rodent Prevention: Rodents may chew on cables; metal or reinforced conduits offer extra security.
Securing Cables: Use clips or brackets to attach cables firmly along walls or roof edges.
Protecting cables preserves connectivity, reduces maintenance, and prevents costly replacements.
5.3 Connecting the Router and Testing Power Supply
After running the cable indoors, proper connection and power testing are essential.
Router Placement: Position the router centrally for even Wi-Fi coverage across the building.
Power Check: Confirm the router is receiving stable power to avoid performance issues.
Cable Connection: Ensure the dish cable is securely plugged into the designated input port.
Initial Testing: Power on the system and verify that lights indicate proper operation.
Proper connection and power verification guarantee that the system is ready for use and avoids startup errors.
5.4 Ensuring Proper Wi-Fi Coverage and Placement for Optimal Network Performance
Router placement affects how well Wi-Fi signals reach devices in all areas.
Centralized Location: Place the router in a central area to reduce dead zones.
Avoid Obstacles: Keep the router away from thick walls, metal objects, or electronics that cause interference.
Elevation: Slightly elevated positions improve signal propagation to all corners of the building.
Device Prioritization: Use app-based controls to manage which devices get priority bandwidth if needed.
Connecting the Starlink dish to the router involves careful cable routing, protection, and strategic router placement. Proper planning prevents physical damage, ensures stable power, and maximizes Wi-Fi coverage. Following these steps ensures that homes and businesses in Kenya enjoy a reliable, high-speed internet experience from their roof-mounted Starlink system.
6. Configuring and Testing the Starlink System
Once the Starlink dish is mounted and connected to the router, configuring the network and verifying performance are essential steps. Proper setup ensures stable internet, optimal speeds, and reliable connectivity for homes or businesses in Kenya.
6.1 Using the Starlink App to Configure Your Network
The Starlink app is the primary tool for system setup and management.
Network Setup: Assign Wi-Fi network names (SSID) and secure passwords.
Device Registration: Add the Starlink dish and router to your account for remote management.
Custom Settings: Configure features such as device prioritization, guest networks, and parental controls.
Remote Access: Allows monitoring and adjustments even if you are away from the premises.
Using the app ensures the network is personalized, secure, and ready for optimal performance.
6.2 Running a Speed Test to Verify Connectivity
Verifying that the network delivers promised speeds is crucial.
App-Based Test: Starlink provides built-in speed testing functionality to measure download, upload, and latency.
Optimal Performance Check: Tests confirm that the dish alignment and router placement are effective.
Baseline Measurement: Establish a reference for future monitoring to detect performance drops.
Comparison: Evaluate speeds against advertised package limits to ensure the system is functioning correctly.
Speed testing confirms that the network meets expected performance levels and identifies potential issues early.
6.3 Troubleshooting Signal or Alignment Issues via the App
Occasional interruptions or weak signals may occur, especially after installation or environmental changes.
Signal Monitoring: The app shows signal strength and connectivity metrics.
Automatic Guidance: In-app prompts help adjust tilt, azimuth, or cable connections.
Error Alerts: The system notifies users of alignment or connectivity problems.
Remote Diagnostics: Some issues can be fixed via the app without physical adjustments.
The app simplifies troubleshooting, ensuring reliable internet without requiring technical expertise for every issue.
Ongoing maintenance helps avoid disruptions and keeps the system running at peak performance.
Regular Inspections: Check for obstructions, loose mounts, or environmental wear on the roof-mounted dish.
App Monitoring: Periodically review network statistics and alerts for anomalies.
Seasonal Adjustments: Account for tree growth, construction, or weather-related changes affecting line-of-sight.
Preventive Action: Early detection of potential problems reduces downtime and maintains stable speeds.
Periodic checks combined with app-based monitoring ensure long-term reliability and uninterrupted internet access.
Configuring and testing the Starlink system is vital for achieving stable, high-speed internet in Kenya. Using the Starlink app for setup, running speed tests, troubleshooting alignment issues, and performing periodic maintenance ensures peak performance for both residential and business users. Regular monitoring safeguards connectivity, allowing users to fully benefit from their roof-mounted Starlink installation.
7. Safety Considerations for Roof Installations
Installing a Starlink dish on a roof involves working at heights, handling electrical equipment, and ensuring that mounts are secure. Following safety protocols is critical to protect both installers and the equipment, especially in Kenyan residential and business settings.
7.1 Using Ladders, Harnesses, and Protective Gear When Accessing the Roof
Working at heights poses risks that must be mitigated with proper equipment.
Ladders: Ensure ladders are stable, properly angled, and placed on firm ground.
Harnesses: Use fall protection harnesses anchored securely to prevent falls.
Protective Gear: Wear helmets, gloves, and non-slip footwear to reduce injury risks.
Team Assistance: Have a second person assist with ladder handling and dish positioning for added safety.
Proper personal protective equipment (PPE) minimizes the risk of accidents during roof installations.
7.2 Avoiding Electrical Hazards During Installation
Electrical safety is critical when mounting the dish and connecting the router.
Power Check: Ensure power outlets are turned off before making any connections.
Weather Precautions: Avoid installing during rain or wet conditions to prevent electrocution.
Cable Handling: Use insulated tools and check cables for wear or damage.
Grounding: Proper grounding of equipment reduces risks from electrical surges or lightning strikes.
Awareness of electrical hazards and taking precautions ensures safe installation and prevents damage to both the installer and equipment.
7.3 Ensuring Mounts Are Securely Fixed to Prevent Damage During Storms or Strong Winds
A roof-mounted dish must withstand harsh weather conditions without shifting or falling.
Sturdy Materials: Use corrosion-resistant bolts, stainless steel, and heavy-duty mounts.
Reinforced Installation: Braces or anchors may be needed in areas exposed to high winds.
Regular Inspection: Periodically check mounts for loosening or wear, especially after storms.
Dish Stability: A secure dish reduces the risk of downtime due to misalignment or equipment damage.
Properly fixed mounts ensure the Starlink dish remains functional and safe during adverse weather conditions.
7.4 Hiring Professional Installers When DIY Is Unsafe or Challenging
Not all roof installations are suitable for DIY due to height, roof type, or structural complexity.
Experience Matters: Professionals are trained in safe ladder use, mount installation, and alignment.
Insurance Coverage: Professional installers often carry liability coverage in case of accidents.
Equipment Handling: Experts bring specialized tools and materials suitable for Kenyan roofs.
Peace of Mind: Hiring professionals reduces risk and ensures optimal dish performance.
Engaging professional installers is recommended when DIY methods pose safety risks or when the installation is technically complex.
Safety is paramount when installing a Starlink dish on a roof. Using proper protective gear, avoiding electrical hazards, securing mounts against weather, and seeking professional help when necessary all contribute to a safe and reliable installation. Following these safety measures ensures that both users and equipment remain protected while maintaining optimal internet performance.
8. Maintenance Tips for Roof-Mounted Starlink
Maintaining a roof-mounted Starlink dish is essential to ensure consistent internet performance and prolong the lifespan of both the equipment and the roof structure. Regular maintenance helps prevent signal disruption and protects your investment.
8.1 Cleaning the Dish Surface to Prevent Debris or Dust Buildup
The Starlink dish must have a clear line-of-sight to satellites for optimal connectivity.
Debris Removal: Regularly remove leaves, twigs, and bird droppings that may accumulate on the dish.
Dust and Dirt: Clean dust, mud, or pollen with a soft cloth or non-abrasive brush.
Avoid Harsh Chemicals: Use mild soap and water if necessary; harsh chemicals can damage the dish surface.
Seasonal Checks: Perform more frequent cleaning during windy or rainy seasons when debris is more likely.
Keeping the dish clean ensures uninterrupted satellite communication and reliable internet speeds.
8.2 Checking Mounts and Cables Periodically for Wear or Damage
Over time, mounts and cables can loosen or deteriorate, affecting performance and safety.
Mount Integrity: Inspect bolts, brackets, and support structures for rust, corrosion, or loosening.
Cable Condition: Look for cracks, fraying, or UV damage along the cable length.
Secure Fastening: Ensure all cables are fastened and protected from wind or accidental tugging.
Early Repairs: Replace or reinforce any compromised components to prevent failures.
Regular inspection of mounts and cables maintains structural stability and consistent connectivity.
8.3 Updating Firmware Through the Starlink App to Maintain Performance
Software updates enhance functionality, security, and system reliability.
Automatic Updates: Starlink often pushes firmware updates automatically; verify via the app.
Manual Checks: Periodically open the app to ensure the latest updates are installed.
Performance Improvements: Updates may improve speed, latency, and device compatibility.
Bug Fixes: Updates address known software issues and prevent potential service disruptions.
Keeping firmware up-to-date ensures the Starlink system operates at peak efficiency.
8.4 Inspecting Roof Structure to Ensure Long-Term Safety and Stability
The roof itself plays a vital role in maintaining dish stability over time.
Structural Health: Check for cracks, loose tiles, or weakened areas under the mount.
Water Damage: Ensure there is no water leakage around mount points that could compromise roof integrity.
Load Distribution: Confirm the dish mount is properly anchored to distribute weight evenly.
Periodic Evaluation: Conduct inspections at least twice a year or after extreme weather events.
Ensuring the roof’s structural integrity protects both the Starlink system and the building itself.
Regular maintenance of a roof-mounted Starlink dish involves cleaning the dish, inspecting mounts and cables, updating firmware, and evaluating the roof structure. By following these tips, users in Kenya can enjoy uninterrupted, high-speed satellite internet while safeguarding their equipment and home. Preventive care reduces downtime, extends system life, and maximizes overall performance.
9. FAQs on Starlink Roof Installation in Kenya
Roof installation is the most reliable method for ensuring a strong Starlink signal. These FAQs address common questions and considerations for users in Kenya, from safety and equipment durability to professional guidance.
9.1 Can I Install Starlink on Any Type of Roof?
Starlink can be installed on most roofs, but structural stability is critical.
Stable Roof Required: Ensure the roof can support the dish and mounting hardware without damage.
Material Consideration: Tile, metal, and concrete roofs are suitable with proper mounts; thatched or weak roofs may need reinforcement.
Safe Access: Check that ladders or scaffolding can reach the installation spot safely.
Roof type matters primarily for stability and safety, not satellite signal reception.
9.2 Is Professional Installation Necessary?
Professional installers are recommended, though DIY is possible.
Safety: Professionals handle heights, wiring, and mount placement safely.
Optimal Signal: Correct tilt and alignment ensure the best internet speeds.
Complex Roofs: Sloped or multi-level roofs may require expert assessment.
Professional installation reduces risk and maximizes performance, particularly for business or multi-dish setups.
9.3 How Long Does Roof Installation Take?
Installation time varies depending on roof complexity and cabling.
Simple Roofs: Flat roofs with easy access may take 1 hour.
Complex Roofs: Sloped or high-rise roofs may require 2–3 hours for safe installation.
Cable Routing: Additional time is needed if cables must pass through walls or attics.
Most residential installations can be completed in a few hours with proper planning.
9.4 What Tools Are Needed for Installation?
Proper tools ensure secure mounting and safe work at heights.
Mounting Hardware: Brackets, bolts, and fasteners suited for your roof type.
Power Tools: Drills, screwdrivers, and wrenches for securing mounts.
Safety Gear: Helmets, harnesses, and non-slip shoes.
Optional Tools: Levels and angle finders for precise dish alignment.
Having the right tools is essential for a safe, effective roof installation.
9.5 Can the Dish Be Damaged by Rain or Wind?
Starlink dishes are designed for outdoor exposure but proper mounting is crucial.
Durable Design: The dish is weather-resistant, including rain, wind, and UV exposure.
Secure Mounting: Reinforced mounts prevent movement during storms.
Periodic Inspection: Check mounts and cables after heavy weather events.
The dish is built for outdoor use, but installation quality affects long-term durability.
9.6 How High Should the Dish Be Above the Roofline?
Elevation helps maintain an unobstructed line-of-sight to satellites.
Obstruction Clearance: Ideally 1–2 meters above nearby trees, walls, or other structures.
Signal Optimization: Higher positioning minimizes interference and improves connectivity.
Mount Type: Pole mounts or brackets can achieve necessary height.
Proper elevation is key for maximizing signal strength and minimizing latency.
9.7 Does the Starlink App Help with Alignment?
Yes, the app guides users during setup.
Signal Indicators: Shows real-time signal strength and satellite visibility.
Alignment Guidance: Suggests adjustments to dish tilt and rotation.
Error Alerts: Warns if obstructions block the dish view.
Using the app simplifies installation and ensures optimal satellite connectivity.
9.8 Can Businesses Install Multiple Roof-Mounted Dishes?
Multiple dishes are feasible for larger operations.
Enhanced Coverage: Offices with many users benefit from multiple dishes.
Redundancy: Multiple dishes provide backup in case one experiences downtime.
Separate Networks: Businesses can dedicate different dishes to different areas or departments.
Multi-dish setups improve reliability and network performance for businesses.
9.9 Do I Need Permits for Roof Installation in Kenya?
Permits are generally not required for residential installations.
Residential Properties: Most homeowners can install without permits.
Commercial Properties: Check local building codes before installing on offices or multi-story buildings.
Compliance: Ensures safety and avoids legal complications.
Always verify local regulations for commercial or complex roof installations.
9.10 How Do I Maintain the Dish on the Roof?
Regular maintenance prevents downtime and prolongs equipment life.
Cleaning: Remove dust, leaves, and debris from the dish surface.
Mount Checks: Inspect bolts, brackets, and fasteners periodically.
Cable Inspection: Look for wear, cracks, or UV damage.
Firmware Updates: Use the Starlink app to ensure the system is up-to-date.
Routine maintenance keeps the dish performing optimally and extends its lifespan.
Roof-mounted Starlink installations in Kenya require careful consideration of safety, signal optimization, and maintenance. From choosing a stable roof and proper tools to leveraging the Starlink app for alignment and monitoring, following these guidelines ensures reliable internet performance, safety for users, and long-term durability of both the equipment and the building structure. Professional installation is recommended when risks or technical complexity are high.
Starlink Roof Installation in Kenya – Achieve Optimal Internet Performance
Roof installation of Starlink in Kenya is key to achieving the best possible satellite internet performance. By mounting the Starlink dish in a location with clear, unobstructed access to the sky, users can fully connect to Starlink’s low-earth-orbit network, ensuring fast and stable internet. Proper site selection, secure mounting, and adherence to safe installation practices are crucial for maintaining long-term reliability and consistent connectivity.
Using the Starlink app alongside your rooftop setup enhances control and monitoring, allowing users to track signal strength, performance, and troubleshoot any minor issues efficiently. This combination of professional installation and app management ensures that both homes and businesses can benefit from uninterrupted high-speed internet, even in areas where traditional broadband is limited.
For more guidance on professional Starlink roof installation and to explore services in Kenya, visit Starlite Internet Kenya. A properly installed Starlink dish not only delivers reliable connectivity but also maximizes the value of satellite broadband, making it an excellent solution for residential and commercial users across the country.